Showing posts with label eyes. Show all posts

Thursday, 7 June 2012

Collection 2000 Teal & Gold Eyeliners

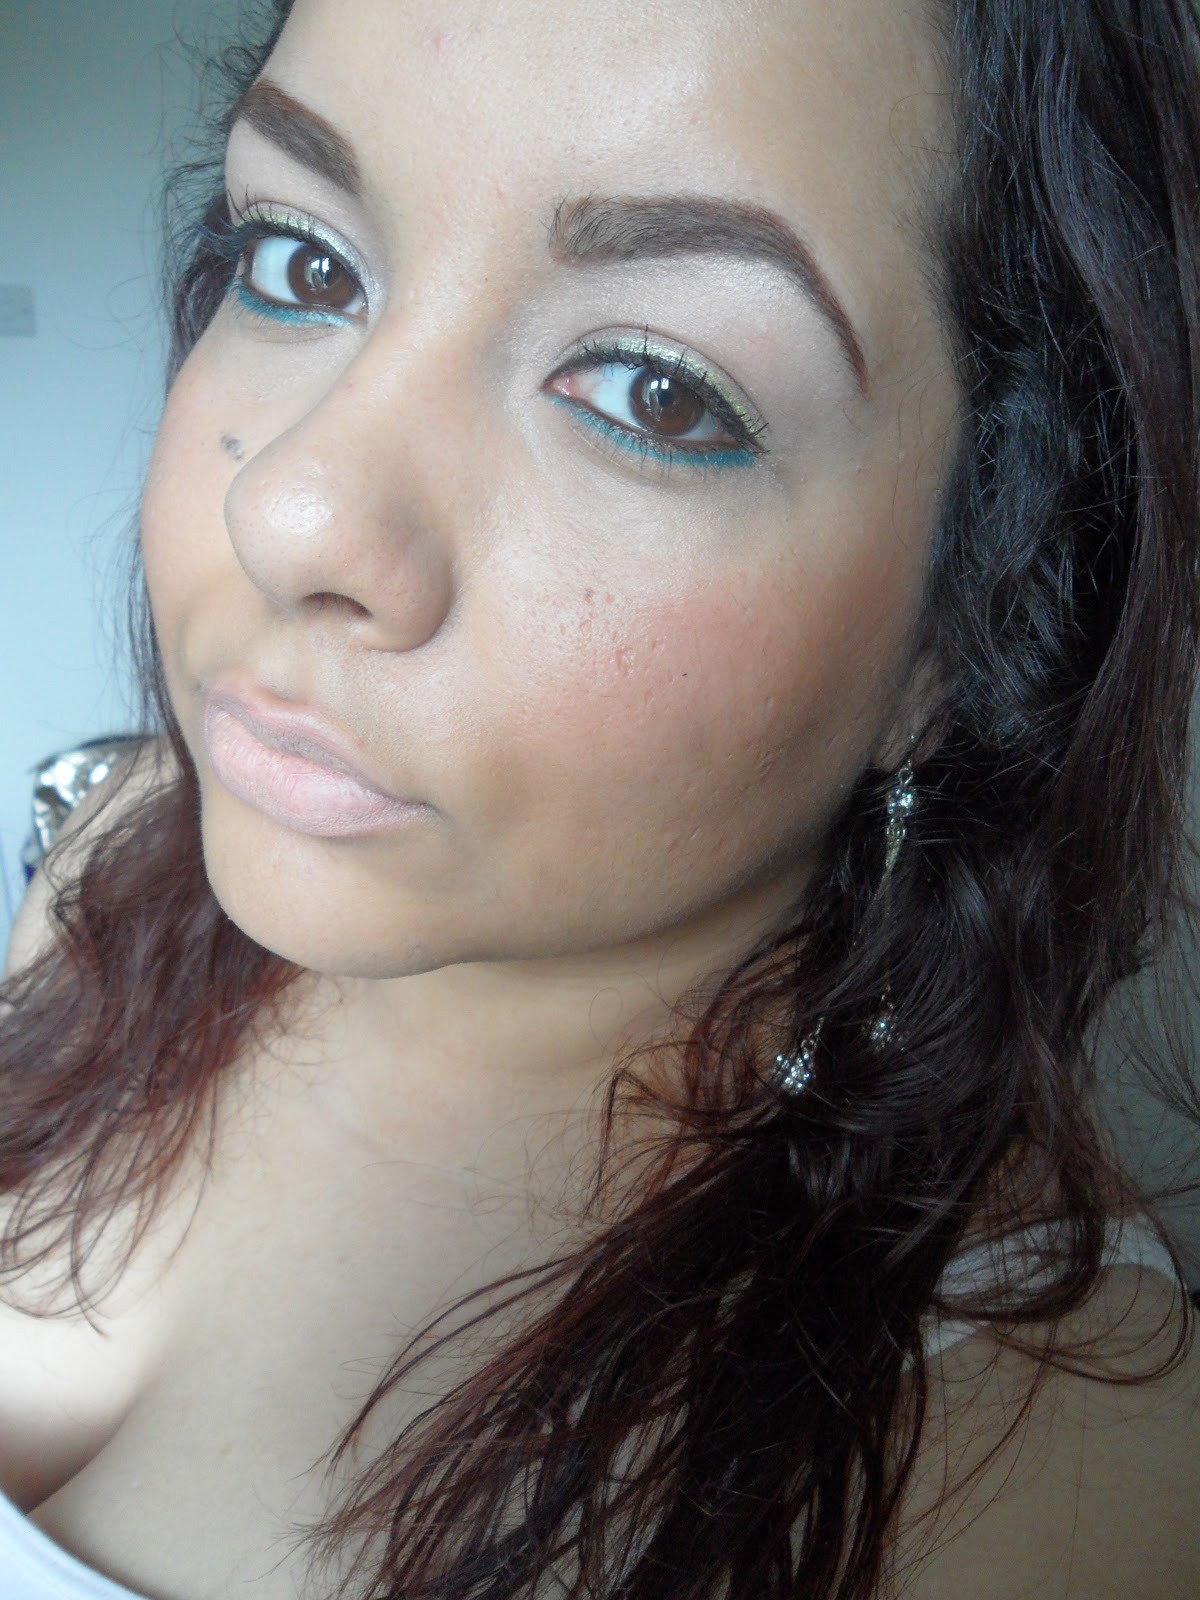
Tuesdays Gold & Teal eye makeup... 


Before applying anything to my eyes I used Urban Deday Primer Potion

I then used a matte beige from my 120 palette all over the eyelid

I lined my top lashline with Maybellines Eyestudio Lasting Drama Gel Eyeliner in Black (such a good eyeliner!)

then ontop of the black eyeliner I used the gel liner from the Collection 2000 range which I reviewed in an earlier post...

On my lower lash line, I used this fab eye pencil in Teal by Collection 2000 & lined my water line with VIVO black khol pencil which is my fave black khol pencil :)

I then primed my lashes with Elizabeth Arden Lash Optimzer - this is also such an AMAZING product!!
then ontop of the lash optimizer, I used L'Oreal Perfect Clean Definition Telescope Mascara

I love my eyebrows looking thick, defined and gorgeous so I always use Rimmels Eyebrow Pencil, and in the picture I have used shade 'Hazel' ... I then use my concealer to go around and define the eyebrow on top, i feel this gives a nice clean and super defined eye brow :)

on the lips I used Collection 2000 new cream puff in Powder Puff 


Wednesday, 6 June 2012

Collection 2000 Lasting ColourGel Liner (Gold)


This review is for the new gel liner by Collection 2000 in the Gold shade  ...

At first I thought maybe it would come out a nice bright yellow/gold but on application the colour payoff really isnt that great *sigh* I dont know why I was expecting to be wowed?! It just looked so good in the packagin even the colour looked vibrant when I opened it up... The brush I have to say is quite useless, its cute, but useless...and quite fidly for my fat fingers... below is a picture of how it looks on my eyes, there was no flash used, and it was taken with natural daylight... 


As you can see, the colour isnt very vivid, which is good if you are not expecting or do not want something bright, but in my case I was hoping the gold would really show, in fact judging by how it looks in the pot, I was expecting for it to show up more of a yellow tone... this is great if you want something subtle, and I think it would be great used as a base to then maybe apply some gold or yellow pigment over it.


If I had to give this a mark out of 10, I would give it a 7.5

although the colour payoff was disapponting, I have to admit that it is long lasting, I wore this the whole day without it smudging or fading.

I would love to try the teal color and as the gel liners are reasonably priced I think I will probably go get one in the next few days....

These gel liners can be bought from Superdrug.com or at your local Superdrug at a cost of £4.99 each.

Have any of you tried these gel liners??? if so what did you think??? 

Tuesday, 31 January 2012

FashionistA Fashion Secret Flawless Primer and Fashion Secret Mattifying Primer

On Friday I went into Superdrug and although initially I went in just to get a few toiletries... inevitably... I ended up in the makeup section... I cant help it!!! I needed a primer, and FashionistA just so happened to have a special offer of half price! soooo I got both primers for £5.00 each... happy days!!!

On Saturday I had the opportunity to use my primers, and boi was I impressed!!! .... I used both of them... The Flawless Primer on my cheeks where I have my acne scars, and the Mattifying Primer on my T-Zone... they both felt amazing on the skin, not greasy, and actually left my skin feeling really soft! My makeup lasted all night, and I didnt need to re-touch AT ALL! ... As you can see, even with flash, my face didnt look 'grey' and without flash my makeup still looked great... so they are most definately going into my kit!!

I am super impressed and think that they are worth paying the full price of £10.00 each once the current promotion ends.

As for the eyeshadows, I really liked them, they blended nicely, and looked great. I always use a primer, so the eyeshadow lasted all night.


Heres a few pics of the final look:

DEEP OCEAN - all over the lid

MIDNIGHT BLUE - Outer 'V' and under the lower lashes


Products Used:
FashionistA - Eyeshadow Palette, Deep Ocean & Midnight Blue
FashionistA - Blush Palette, Cinnamon
FashionistA - Fashion Secret Flawless Primer & Fashion Secret Mattifying Primer
Giorgio Armani Foundation
OCC Lip Tar
MAC Concealer
SLEEK Contour Poweder in Medium
KIKO Lipgloss
GOSH Eyebrow Gel (review soon coming)
Rimmel Eyebrow Pencil


If you would like to purchase any FashionistA products, go to:
Superdrug

you can also follow them on twitter to keep fully updated: @fashionista_sil

Thursday, 24 November 2011

VIVO Radiant Boost Highlighter

Today I am doing a quick review of the VIVO Radiant Boost Highlighter... 

 I love the packaging, the product is easy to apply with the brush, however I would recommend dabbing a few dots under the eye, then tapping/smoothing it out with your finger...

the consistency is quite creamy, and has a nice 'pinkish' shade which is great for concealing dark circles as well as giving a nice brightening effect.


I think its a pretty good buy if your on a budget, if I had to give it a mark out of 10, I'd probably give it an 8.

Hope this was helpful if you have been indecisive on whether to get it or not. 

Muuaahhh JennJenn <3


Friday, 23 September 2011

ELF Waterproof Line ... yeay or nay?!

Very short post for now... but I just had to say how dissapointed I am with ELF's Waterproof Eyeliner...

http://www.eyeslipsface.co.uk/
I know it was a cheap buy, so this time round I guess you are getting what you pay for...
The tip has already some fluffy bit hanging off...
It feels like its very dry - i dunno maybe i was sent a dried up pen???
It tugs a bit on the skin...
It takes quite a few strokes to get a decent line...

Now I have to say that although I will not be purchasing this pen again... the only pros to it is... the price... (if that is a pro?) and that whatever I have applied, does actually last a while...

Have any of you tried this Eyeliner Pen before???? Do you find it to be quite dry??? or could it just be that I was sent a dried up one???? What liquid liner do you use????

Would love to know your thoughts....

also... want to take the opportunity to say a big welcome to my new subbies so if your reading this... HEY :) !!  

Muuaahhh JennJenn

Monday, 5 September 2011

Sleeks 'The Original' Palette

I have two Sleek palettes which to be honest have probably only ever used a handful of times... I just havent really seen the color intensity like I've seen on other people... so I quite honestly gave up on them... I found them to be far too shimmery and not as easy to blend... however! I decided to give it one last try... because I am really liking the new palettes that have come out, and want to get them, but I want to make sure I can make the one I already have work for me... sooooo I used the original palette...


Out of the 12 colors I used 3 to achieve the below:


The colors do not have a name so I named them myself ...

PINK - for the main colour
OLIVE - for the outer half of the eye
BRONZE/BROWN - for the outer 'V' and crease
As you can see from the main pic, you cant really notice much of the Olive type green or the Bronze/Brown... but eitherway, I actually felt alot more satisfied with the look this time... to be honest the pictures dont do it much justice...


THE PRODUCTS USED TODAY (I havent shown my whole face in this post as I wanted to focus more on the eyes, but thought I would list all the products I used today anyways)

EYES:
Barbara Daly Eyeshadow Pen in Shimmer Sand as a base
Sleeks Paletter 'The Original'
ELF Eyeliner Pen
ELF Mascara

FACE:
ELF Tinted Moisturizer in Beige

LIPS:
NARS Lip Liner
Peachy Pink Lip Palette by Sue Moxley (buy it in Superdrug)

EYEBROWS:
Rimmerl Eyebrow Pencil in Hazel

www.sleekmakeup.com
www.eyeslipsface.co.uk
www.superdrug.com (incase you want to purchase famous by sue moxley, even Sleek makeup)


Sunday, 4 September 2011

Barbara Daly Eyeshadow Pens

::BARBARA DALY EYESHADOW PENS::

A couple of months back, I stumbled through the Barbara Daly makeup stand at Tescos supermarket... I bought an liquid eyeshadow which is currently part of my daily makeup routine... so a few days ago I went back to see what else I could pick up and I came across 2 new products... the BD Eyeshadow Pens... I ABSOLUTELY LOVE THEM...


SHIMMER SAND - a nice gold/pink shade
SHELL - more of a shimmery silver shade
They where both £4.75 comes in 3 shades, the shades that I purchased are SHELL & SHIMMER SAND ... they give a nice irridescent colour, which is buildable by adding a few extra layers.... super easy to use, and very well packaged... its a twist up creamy type pencil so glides on nicely without tugging at the skin... I use my fingers to blend the color in, but you can use a synthetic brush like the MAC 242 would also blend it nicely...
You really cant go wrong with these eyeshadow pens...

xx

Thursday, 5 May 2011

Yellow & Green Eyes (Rhianna Inspired)

EYES INSPIRED BY RHIANNA'S 'WHO'S THAT CHICK' MUSIC VIDEO ...


El color amarillo no es que sea el color mas comun para usar como sombra en los ojos... maybe because its too bright? some people may feel they are going to look like un payaso! lol (if u dnt do it right any makeup can make u look like a clown!) others are just a little scared to experiment... however, Rhianna inspired this next look, I was watching her 'Whose That Chic' video y me encanto el maquillaje! soooo I tried doing something similar pero algo que yo se que cualquiera puede lucir... so hope you like...


PRODUCTS USED:

NYX jumbo pencil in Milk as a base
Yellow (matte) eyeshadow from my Manly Palette
Nude (matte) eyeshadow from my Manly Palette
White (matte) eyeshadow from my Manly Palette (as a highlighter)
Green eyeshadow from my Manly Palette (used under the lower lashes)
Revlon Foundation
Nude shade lipstick from my 'Glamourous' lip palette (bought in Superdrug)
Bronzer
Rimmel Eyebrow Pencil
Eyelure lashes
Bourjois Liquid Liner in Black

Friday, 18 March 2011

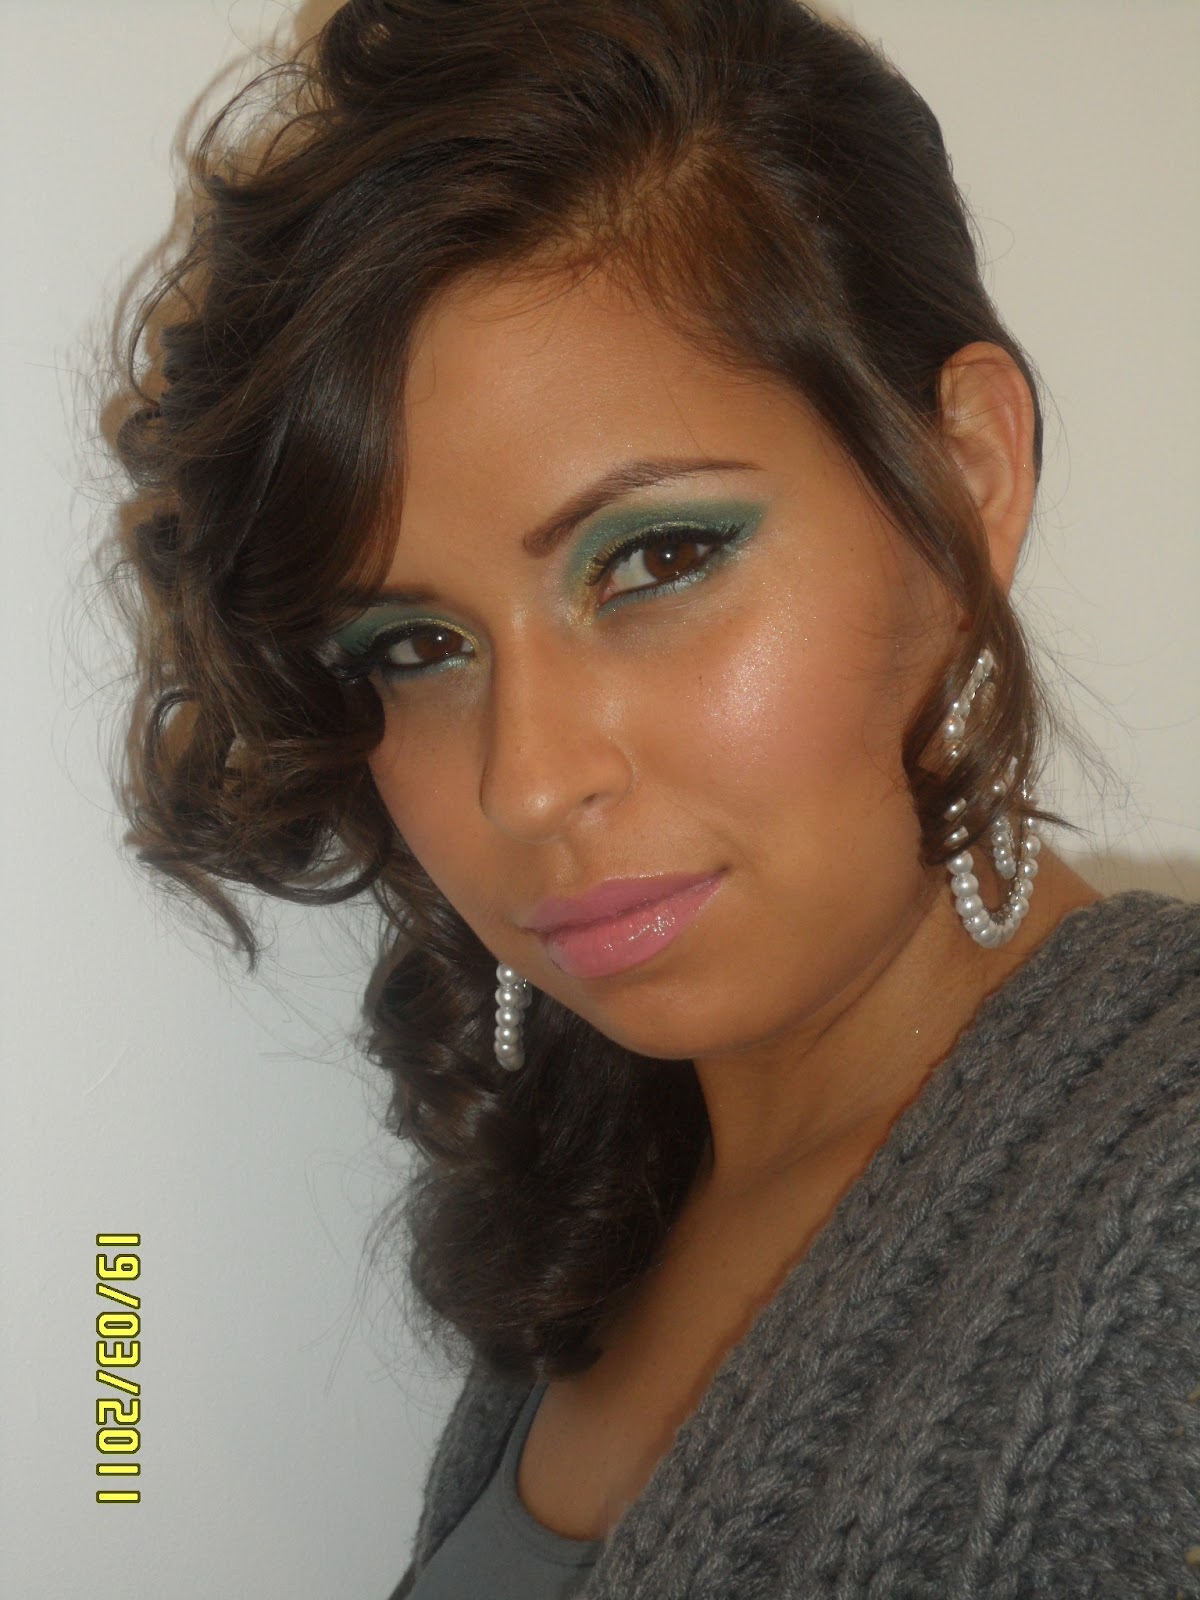
MAKE-OVER: Gold & Teal Eyes :)

Ok so its been a few days since i posted something, its been nuts at work so I really havent been inspired to write anything ... blah! but im back with something awesome!! Ages ago i asked my friend to be a model for me so I cud do some makeup for the blog, finally today we managed to get round to it! it was so much fun, I just love how makeup can transform smeone, from the most simple makeup, a tweek here and there, even a different hair style!

Anyways, so my friend doesnt usually wear alot of makeup, mainly just blush, lipgloss a bit of liner and thats about it... she had recently seen what i think is the Rimmel advert with all the crazy colours (woohhhooo someone who will let me use bold colours!!!) and so she wanted to try something bright and fun ... Because of her skin tone I thought AQUA, TEAL, GOLD... these colours looks so amazing on tanned skin!! soooooo keep scrollin and see what the outcome was .... aaahhhh i had soooo much fun doing this look!!!! :)

Before applying any makeup, I primed Paola's face with Urban Decay Complexion Potion and then primed her eyes firstly with Too Faced Shadow Insurance, and then with a synthetic brush I applied MAC Prep + Prime in medium.


EYES:
set the primer with either a nude or white matt shadow - i used The Body Shop Eye Colour Matte in #13
I then applied in the inner corners of the eyes a gold pigment - NYX Pearl Pigment in Yellow Gold
Then i applied a light green to the lids only - NYX Pear Pigment in Lime Pearl
I then applied a teal colour to the crease and blended - i used two different colours one from Sleek palette and one from my Manly Palette, you can you which ever colour you have.
although you cant notice it, I also applied a navy blue just to the outer 'V' and blended with the teal.
I then highlighted under the brow using MAC Naked Lunch - this is like a pinkish/gold tone
I then lined her upper lash line with SLEEK Ink Pot
I lined the lower lashes first with a teal colour pencil by a brand called Deborah (bought in Paris) you can probably find a good similar colour by looking at NYX pencils or even Barry M.
I then lined her waterline with AVONs Glimmer Stick in Black
I then applied some lashes by E.L.F (the glue sucks so I used my Eyelure glue which i love!)


EYEBROWS
using light strokes I filled in her brows using a brown eyebrow pencil by Rimmel


FACE
I used LAURA MERCIER Concealer under her eyes, and around her nose
Then applied NYC Foundation in Natural Tan
then I set her foundation with a powder, i used one by L'Oreal
For contour, I used SLEEK Face Contour Kit in Medium, i applied just under her cheek bone, and also around the sides of her nose.
To highlight, i used a little bit of pearl pigment by NYX in Nude Pearl then over that I used MAC Mineralize Skin Finish in Soft and Gentle (this looks amazing on her!!) looks much better than on me!! lol poohhh
I then applied some pink blush by L'Oreal in True Rose


LIPS
for the first few pics I used a plum shade of lipgloss which i recently bought from E.L.F
for the pictures where Paolas hair is down and curly, I used a pink matte lip colour by bourjois

And there you have it girlies... espero les haya gustado el resultado! If you are not comfortable applying eyeshadow or want something quick, remember, just get an eye pencil in the colour you want (in this case a teal colour) and line both your upper and lower lashes for instant colour :) without the fuss ;0)

Aqui las dejo con mas fotos ...


Saturday, 19 February 2011

Green...From Day to Night...

Whats up ladies, hope so far the weekend has treated you good, most right now are probably getting ready to go partyyyyy and some like me are probably just chillin at home :) anyways so today had to go do some errands, and I had about 45mins to get ready... now when you need to get ready quick time, asi sea maquillarse en el bus, carro o tren, I would seriously advise you to invest in shadow sticks!! THEY ROCK!!! Today I'm going to show you lovely ladies how to go green... and take it from day to night :)

DAY LOOK:

So for the day look, as usual started with primer on the eyes, then I used Metallic Sparks by BeautyUK in Emerald Green... literally just draw on the colour to the lids, if like me you have quite an oily skin, since these pencils are very creamy, follow it up with an eyeshadow close to the colour of the pencil you are using...
I then lined my eyes lightly with Bourjois Liquid liner in Black and the lower rim with Avon Glimmerstick in Black. As a highlight all over the brow bone I used MAC Naked Lunch eyeshadow... then applied loads of mascara and a bit of blush on my cheeks with clear lipgloss... and that was it, quick and easy... ready to go...


NIGHT LOOK:


for the night look.... simply apply a grey or black eyeshadow to the outer V of the eye and bring it up into the crease... then blend it with the green slightly and you will end up with a bit of Khaki eyeshadow shade on the crease... to really intensify the colour just keep adding on more grey until you are satisfied... then add a thicker line of liquid liner in black and add more black liner to the lower rim... fill in your eyebrows with a brown or black eyeshadow or pencil... for the lips I used a pink lipgloss by 17...


and there you have it chicas... quick and easy way to go from a day look to a night look ready to party :)

Aqui las dejo with a few more pics... give it a go... i know green isnt usually the choice of colour for most, pero el color verde can really bring out brown eyes and will look great with blue or green eyes :) .... experiment with different shades until you get to a shade that will suit your skin tone and eyes, even mood!


muuaaahhhh JennJenn

Thursday, 10 February 2011

Valentines Day Makeup - 3 adaptable looks :)

Hey girlies... so today i was at the supermarket, and guess what caught my eye! KRISPY KREME!!! but not just your typica Krispy Kreme but a heart shaped Krispy Kreme!!! it was so cute... i bought one for the hubby since he likes Krispy Kreme... :) anyways just thought I wud share that with you jejejejeje

Okay so today I did 3 looks... I started with a basic nude eye look, then adapted it slightly by adding some colour to the lower lashes and a little just under the brow... then I did a more 'smokey' look... the lip colour stayed the same through out... why did i do this? well because some of you may really not be keen on too much colour so I did a simple nude eye look with colour just on the lips... some of you may want to try a but of colour on the eyes but are a bit scared of looking like a clown, so the easy way to introduce colour is by adding a hint of colour just under the lower lashes with the option of adding also just under the brow...for those who really want a more dramatic look, I did the smokey eye... so i hope you like all three looks, and maybe it will inspire you to try them....

PREPPING BEFORE YOU BEGIN:

Before starting, as usual I applied Too Faced Shadow Insurance to the whole lid and brow bone, then applied NYX Jumbo Pencil in Milk. I also primed my face with Urban Decay Complexion Potion and used Laura Mercier  Concealer to cover the dark circles under my eyes and then applied NYC foundation. I contoured my cheeks (i have a fat face lol) with Sleek Face Contour in Medium and then applied some blush by 17.

NUDE EYES & PINK LIPS: good for those who dont like to wear alot of eyemakup or who have hubbys that dont like their women wearing alot of makeup - yes this is the case with some ppl ;0)


I applied a matte eyeshadow close to my skin colour all over the lid and brow bone... to give a slight contour I added a light brown just to the crease... I lined my eye with Sleeks Ink Pot in Black, I didnt do too much of a long wing kept it quite short... under the lower lashes i applied a MAC eyeshadow in a soft color...then added some white pencil to the waterline... i applied mascara to both the top and lower lashes...

NUDE EYES WITH A HINT OF COLOR & PINK LIPS: this is great for those of you who want to add a hint of color to your Valentines day look :)


so the process was the same as above, just that I added a fucia pink (you can use whatever colour u like) just under the lower lashes... I then added a more neon pink just under the eyebrow and blended it with a highlighter colour

SMOKEY LOOK & PINK LIPS: this is for those who want a more dramatic a sultry look... great for an evening date.


Instead of applying black to creat the smokey eye effect, I used a dark shade of grey. I only applied this grey color to the crease... I then added more highlighter on the browbone and applied a bit more of the matte eyeshadow to the eyelid. I also added Avon Glimmerstick in black to the waterline...

So there you have it chicas! 3 looks, each time adapting it to make it more dramatic... all three looks would suit anyone and will look uuhh-mazin for Valentines day, I guarantee your partner will be blown away with whichever look you go for ;0) ...

Here are a few more pics....


Related Posts Plugin for WordPress, Blogger...