Ok so its been a few days since i posted something, its been nuts at work so I really havent been inspired to write anything ... blah! but im back with something awesome!! Ages ago i asked my friend to be a model for me so I cud do some makeup for the blog, finally today we managed to get round to it! it was so much fun, I just love how makeup can transform smeone, from the most simple makeup, a tweek here and there, even a different hair style!
Anyways, so my friend doesnt usually wear alot of makeup, mainly just blush, lipgloss a bit of liner and thats about it... she had recently seen what i think is the Rimmel advert with all the crazy colours (woohhhooo someone who will let me use bold colours!!!) and so she wanted to try something bright and fun ... Because of her skin tone I thought AQUA, TEAL, GOLD... these colours looks so amazing on tanned skin!! soooooo keep scrollin and see what the outcome was .... aaahhhh i had soooo much fun doing this look!!!! :)
Before applying any makeup, I primed Paola's face with Urban Decay Complexion Potion and then primed her eyes firstly with Too Faced Shadow Insurance, and then with a synthetic brush I applied MAC Prep + Prime in medium.

EYES:
set the primer with either a nude or white matt shadow - i used The Body Shop Eye Colour Matte in #13
I then applied in the inner corners of the eyes a gold pigment - NYX Pearl Pigment in Yellow Gold
Then i applied a light green to the lids only - NYX Pear Pigment in Lime Pearl
I then applied a teal colour to the crease and blended - i used two different colours one from Sleek palette and one from my Manly Palette, you can you which ever colour you have.
although you cant notice it, I also applied a navy blue just to the outer 'V' and blended with the teal.
I then highlighted under the brow using MAC Naked Lunch - this is like a pinkish/gold tone
I then lined her upper lash line with SLEEK Ink Pot
I lined the lower lashes first with a teal colour pencil by a brand called Deborah (bought in Paris) you can probably find a good similar colour by looking at NYX pencils or even Barry M.
I then lined her waterline with AVONs Glimmer Stick in Black
I then applied some lashes by E.L.F (the glue sucks so I used my Eyelure glue which i love!)

EYEBROWS
using light strokes I filled in her brows using a brown eyebrow pencil by Rimmel

FACE
I used LAURA MERCIER Concealer under her eyes, and around her nose
Then applied NYC Foundation in Natural Tan
then I set her foundation with a powder, i used one by L'Oreal
For contour, I used SLEEK Face Contour Kit in Medium, i applied just under her cheek bone, and also around the sides of her nose.
To highlight, i used a little bit of pearl pigment by NYX in Nude Pearl then over that I used MAC Mineralize Skin Finish in Soft and Gentle (this looks amazing on her!!) looks much better than on me!! lol poohhh
I then applied some pink blush by L'Oreal in True Rose


LIPS
for the first few pics I used a plum shade of lipgloss which i recently bought from E.L.F
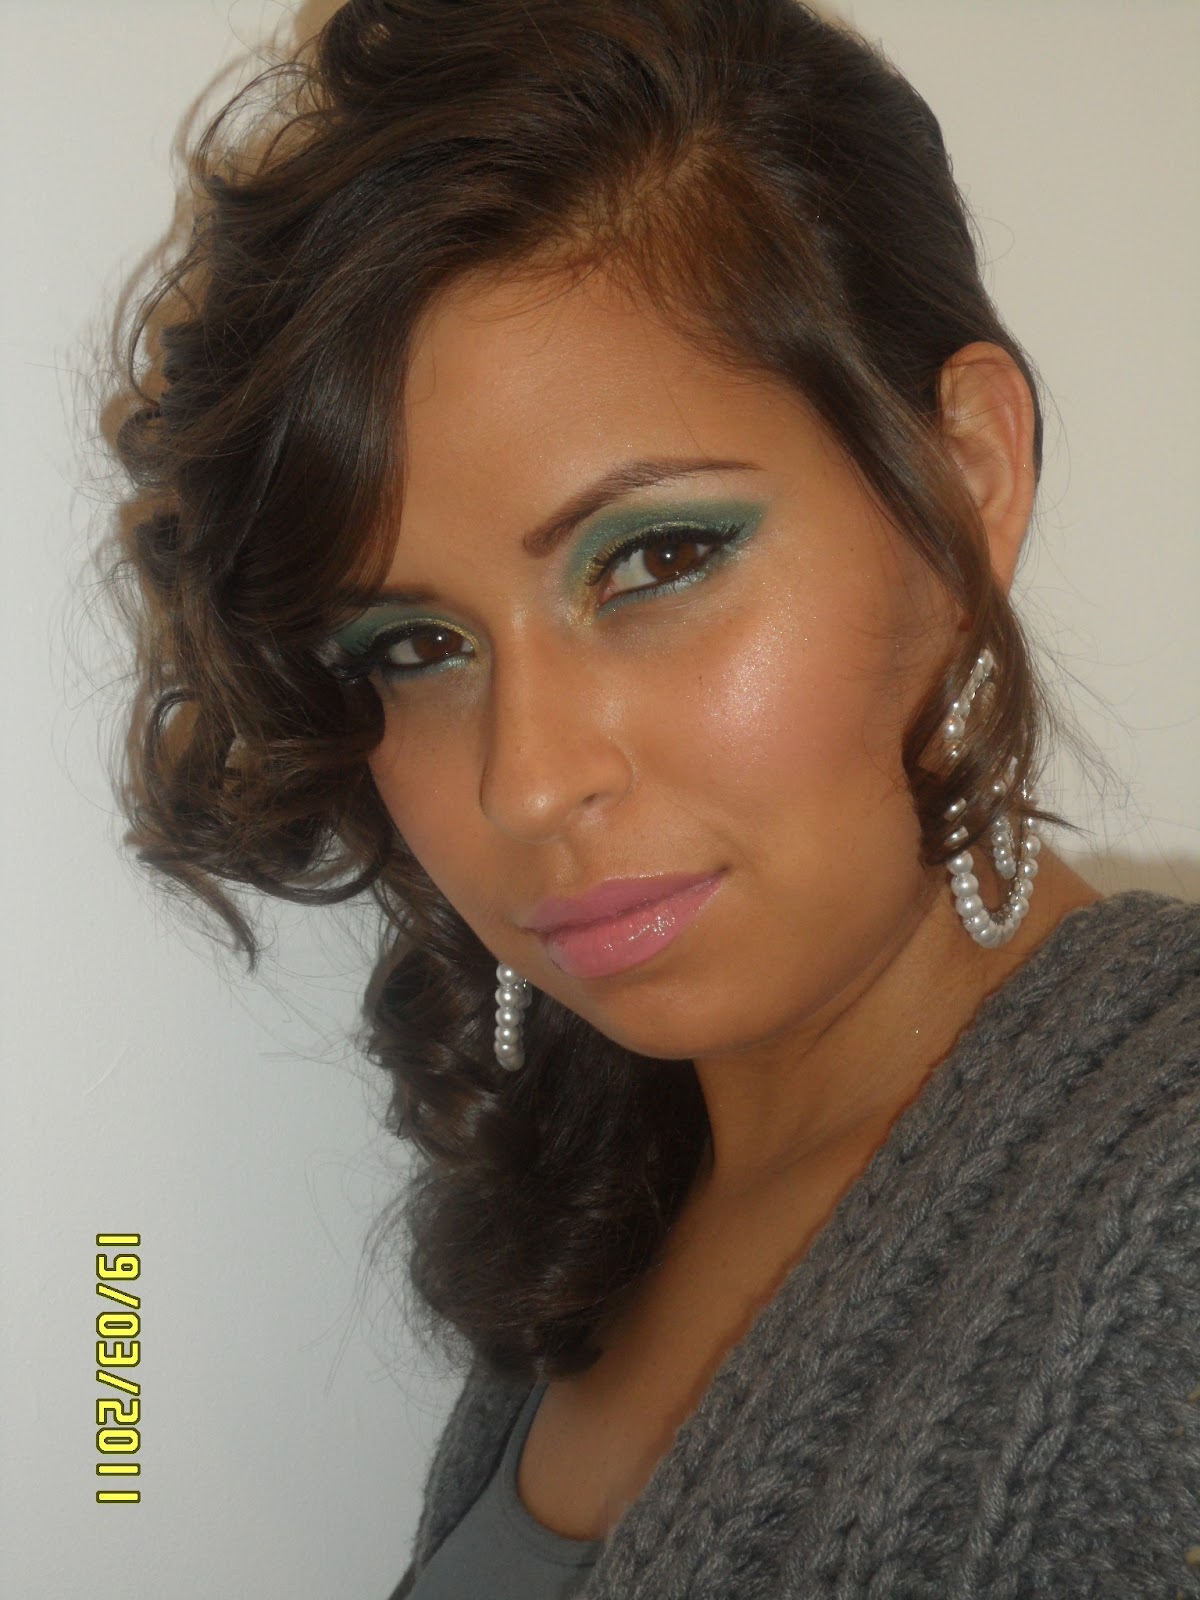
for the pictures where Paolas hair is down and curly, I used a pink matte lip colour by bourjois

 And there you have it girlies... espero les haya gustado el resultado! If you are not comfortable applying eyeshadow or want something quick, remember, just get an eye pencil in the colour you want (in this case a teal colour) and line both your upper and lower lashes for instant colour :) without the fuss ;0)
Aqui las dejo con mas fotos ...


Anyways, so my friend doesnt usually wear alot of makeup, mainly just blush, lipgloss a bit of liner and thats about it... she had recently seen what i think is the Rimmel advert with all the crazy colours (woohhhooo someone who will let me use bold colours!!!) and so she wanted to try something bright and fun ... Because of her skin tone I thought AQUA, TEAL, GOLD... these colours looks so amazing on tanned skin!! soooooo keep scrollin and see what the outcome was .... aaahhhh i had soooo much fun doing this look!!!! :)

EYES:
set the primer with either a nude or white matt shadow - i used The Body Shop Eye Colour Matte in #13
I then applied in the inner corners of the eyes a gold pigment - NYX Pearl Pigment in Yellow Gold
Then i applied a light green to the lids only - NYX Pear Pigment in Lime Pearl
I then applied a teal colour to the crease and blended - i used two different colours one from Sleek palette and one from my Manly Palette, you can you which ever colour you have.
although you cant notice it, I also applied a navy blue just to the outer 'V' and blended with the teal.
I then highlighted under the brow using MAC Naked Lunch - this is like a pinkish/gold tone
I then lined her upper lash line with SLEEK Ink Pot
I lined the lower lashes first with a teal colour pencil by a brand called Deborah (bought in Paris) you can probably find a good similar colour by looking at NYX pencils or even Barry M.
I then lined her waterline with AVONs Glimmer Stick in Black
I then applied some lashes by E.L.F (the glue sucks so I used my Eyelure glue which i love!)

EYEBROWS
using light strokes I filled in her brows using a brown eyebrow pencil by Rimmel

FACE
I used LAURA MERCIER Concealer under her eyes, and around her nose
Then applied NYC Foundation in Natural Tan
then I set her foundation with a powder, i used one by L'Oreal
For contour, I used SLEEK Face Contour Kit in Medium, i applied just under her cheek bone, and also around the sides of her nose.
To highlight, i used a little bit of pearl pigment by NYX in Nude Pearl then over that I used MAC Mineralize Skin Finish in Soft and Gentle (this looks amazing on her!!) looks much better than on me!! lol poohhh
I then applied some pink blush by L'Oreal in True Rose


LIPS
for the first few pics I used a plum shade of lipgloss which i recently bought from E.L.F
for the pictures where Paolas hair is down and curly, I used a pink matte lip colour by bourjois


Aqui las dejo con mas fotos ...


wow that is sooo beautiful! i love how detailed your instructions are, gonna try this out! thank you x
ReplyDeleteyour welcome sweetie! and thank you! :) xx
ReplyDelete